

DBMIND环境配置
配置yum源
配置pypi源
参考如下命令使用第三方库配置pypi源。
pip config set global.index-url XXXXX
安装postgresql
1、检查安装源,确定为x86_64位。
yum search postgresql
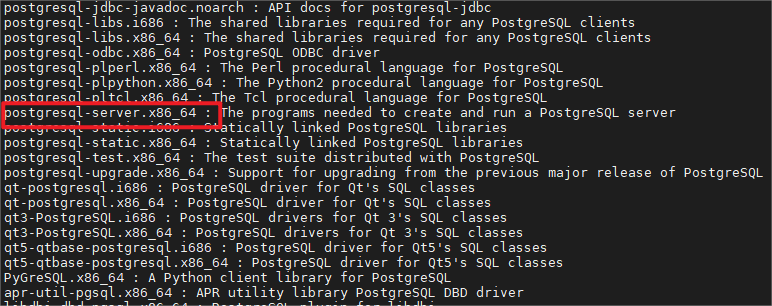
2、安装postgresql。
yum install postgresql-server
3、安装完成后确定相关命令都已配置好。
安装postgresql-server会附带安装上postgres客户端,因此不必重复安装。安装完成,postgresql操作相关的命令都会添加到/usr/bin目录下,可以在命令行下直接使用。
which psql
which postgresql-setup
whereis postgresql-setup

4、检查版本信息。
psql --version

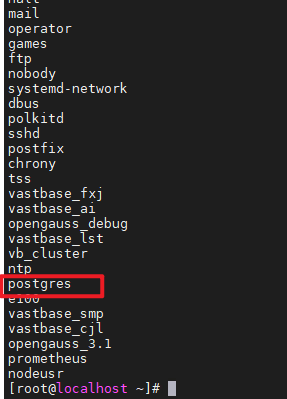
5、查看生成的用户,安装完成的同时,还会生成postgres用户,postgresql启动之后,在本机只能切换到postgres用户下才可以通过psql访问。
cut -d : -f 1 /etc/passwd
6、初始化数据。
安装完成之后,不能直接启动数据库,需要先执行初始化。
postgresql-setup initdb
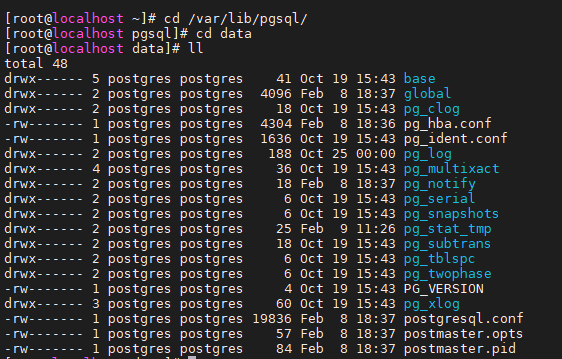
7、检查数据存储路径。
初始化之后,会生成postgresql相关配置文件和数据库文件,这些都会存放在路径/var/lib/pgsql/data下。
cd /var/lib/pgsql/data
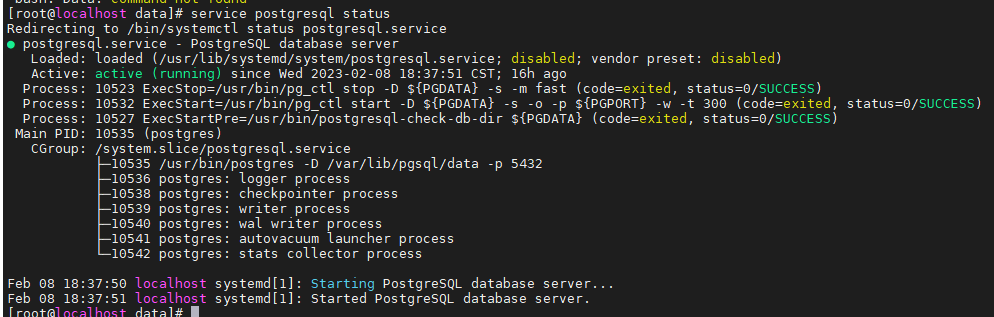
8、启动数据库,查看数据库状态。
service postgresql start
service postgresql status
9、登录配置。
默认情况下,我们使用psql postgres命令登录,使用的是root用户,会提示没有这个角色,需要切换到postgres用户,然后直接登录。
设置postgres用户的密码,设置成功后切换到该用户登录。
passwd postgres
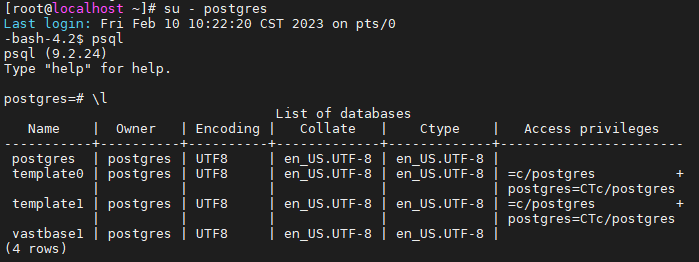
su - postgres
psql
10、设置root用户可以直接登录。
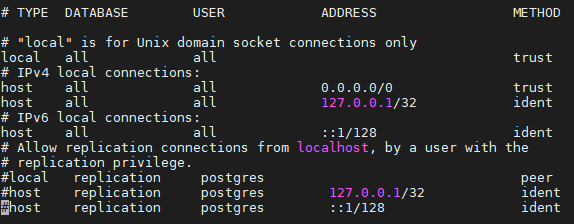
root用户下无法通过psql -U postgres登录的问题,需要修改/var/lib/pgsql/data里的配置文件pg_hba.conf,将local all all peer 修改为local all all trust,并在文件中添加一行配置host all all 0.0.0.0/0 trust。
11、为了外部IP能够连接本机的postgresql,我们需要修改postgresql.conf配置文件中的listen_addresses属性为”*“。
12、修改成功之后,重启数据库服务。
service postgresql restart
13、监听本机地址为0.0.0.0:5432。
netstat -nat

14、使用root用户直接登录postgresql数据库。
psql -U postgres

15、创建用户和数据库。
create user db_test SUPERUSER PASSWORD 'Gauss_123';
create database vastbase1;

安装prometheus和node-exporter
1、禁用防火墙。
(1)执行如下命令打开config文件。
vim /etc/selinux/config
(2)将SELINUX=enforcing修改为SELINUX=disabled。
(3)重启系统。
reboot
2、下载prometheus和node-exporter安装包。
下载地址:
prometheus:https://prometheus.io/download/
node-exporter:https://prometheus.io/download/#node_exporter
配置prometheus
1、添加用户prometheus。
useradd --no-create-home --shell /bin/false prometheus
2、创建目录。
mkdir /etc/prometheus
mkdir /var/lib/prometheus
3、改变目录权限。
chown prometheus:prometheus /etc/prometheus
chown prometheus:prometheus /var/lib/prometheus
4、切换到下载prometheus的目录下,解压prometheus。
tar -xvzf prometheus-2.8.1.linux-amd64.tar.gz
mv prometheus-2.8.1.linux-amd64 prometheuspackage
5、将prometheus和promtool 二进制文件从”prometheuspackage”文件夹复制到”/usr/local/bin/“目录下。
cp prometheuspackage/prometheus /usr/local/bin/
cp prometheuspackage/promtool /usr/local/bin/
6、更改prometheus和promtool 属主。
chown prometheus:prometheus /usr/local/bin/prometheus
chown prometheus:prometheus /usr/local/bin/promtool
7、将consoles和console libraries目录从”prometheuspackage”复制到”/etc/prometheus”文件夹。
cp -r prometheuspackage/consoles /etc/prometheus
cp -r prometheuspackage/console_libraries /etc/prometheus
8、将所有权更改为prometheus 用户。
chown -R prometheus:prometheus /etc/prometheus/consoles
chown -R prometheus:prometheus /etc/prometheus/console_libraries
9、添加并修改prometheus配置文件。
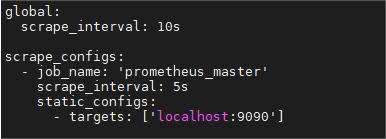
vi /etc/prometheus/prometheus.yml
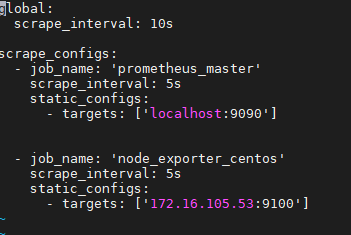
将以下配置添加到该文件中:
global:
  scrape_interval: 10s

scrape_configs:
  - job_name: 'prometheus_master'
    scrape_interval: 5s
    static_configs:
      - targets: ['localhost:9090']
10、更改文件所有权。
chown prometheus:prometheus /etc/prometheus/prometheus.yml
11、配置prometheus service。
vi /etc/systemd/system/prometheus.service
将以下内容添加到该文件中:
[Unit]
Description=Prometheus
Wants=network-online.target
After=network-online.target

[Service]
User=prometheus
Group=prometheus
Type=simple
ExecStart=/usr/local/bin/prometheus \
--config.file /etc/prometheus/prometheus.yml \
--storage.tsdb.path /var/lib/prometheus/ \
--web.console.templates=/etc/prometheus/consoles \
--web.console.libraries=/etc/prometheus/console_libraries

[Install]
WantedBy=multi-user.target
12、重新加载systemd服务并启动
systemctl daemon-reload
# 启动
systemctl start prometheus
# 查看状态
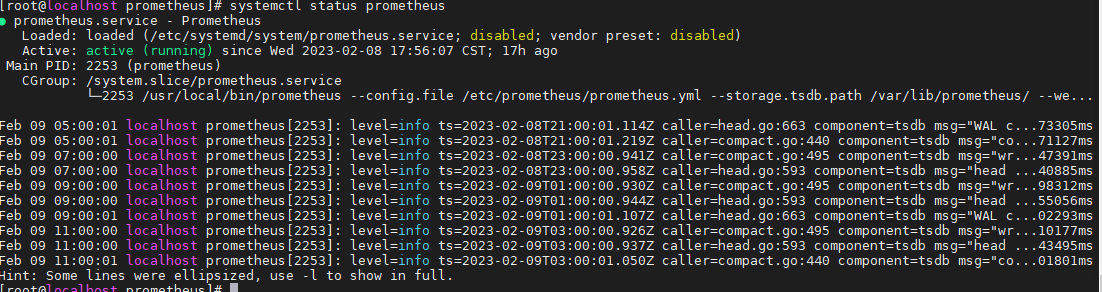
systemctl status prometheus
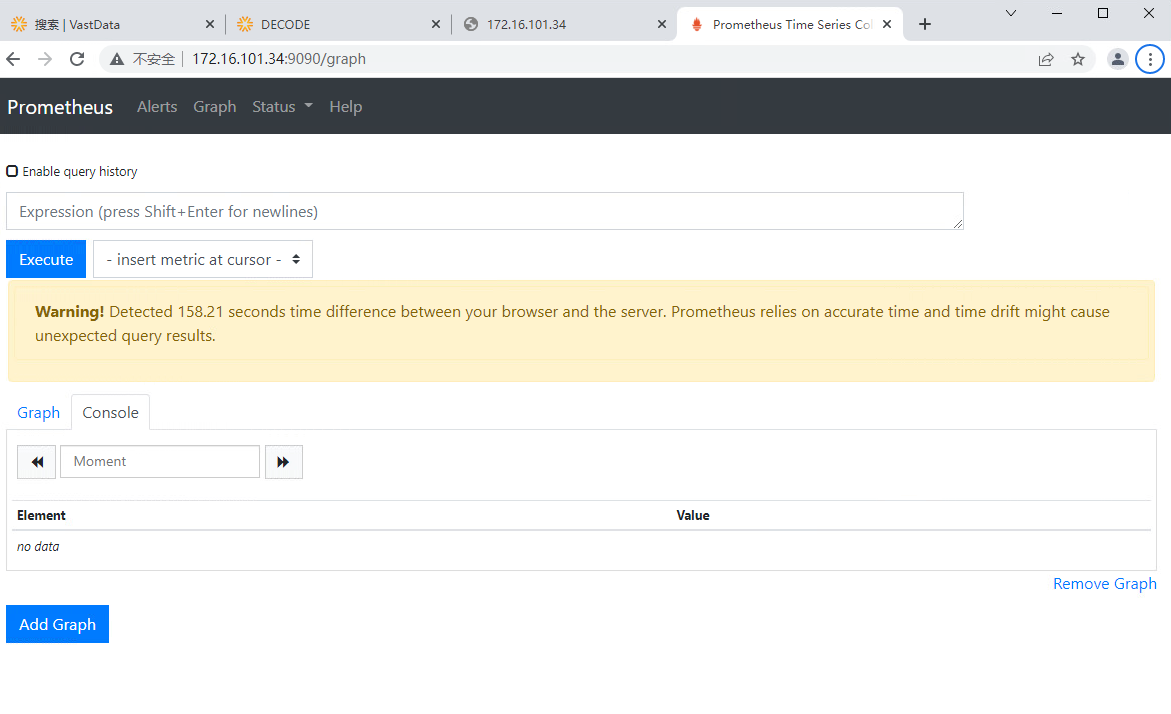
13、访问Prometheus Web界面。
使用以下url访问UI(Server-IP已实际为准):
http://Server-IP:9090/graph
配置node-exporter
1、切换到node-exporter下载目录,解压node exporter。
tar -xf node_exporter-0.17.0.linux-amd64.tar.gz
2、 为node-exporter创建用户。
useradd -rs /bin/false nodeusr
3、移动二进制文件。
mv node_exporter-0.17.0.linux-amd64/node_exporter /usr/local/bin/
4、为node-exporter创建配置文件。
vi /etc/systemd/system/node_exporter.service
将以下内容添加到该文件中:
[Unit]
Description=Node Exporter
After=network.target

[Service]
User=nodeusr
Group=nodeusr
Type=simple
ExecStart=/usr/local/bin/node_exporter

[Install]
WantedBy=multi-user.target
5、重新加载系统守护程序,并查看状态。
systemctl daemon-reload
systemctl start node_exporter
systemctl enable node_exporter
systemctl status node_exporter

6、在prometheus sever上添加已配置的node_exporter Target。
vi /etc/prometheus/prometheus.yml
在scrape配置下添加以下配置(其中targets中IP以实际为准):
 - job_name: 'node_exporter_centos'
    scrape_interval: 5s
    static_configs:
      - targets: ['172.16.105.53:9100']
7、重启prometheus 服务。
systemctl restart prometheus
8、安装成功后启动正常,查看相关端口已启动。
netstat -nat

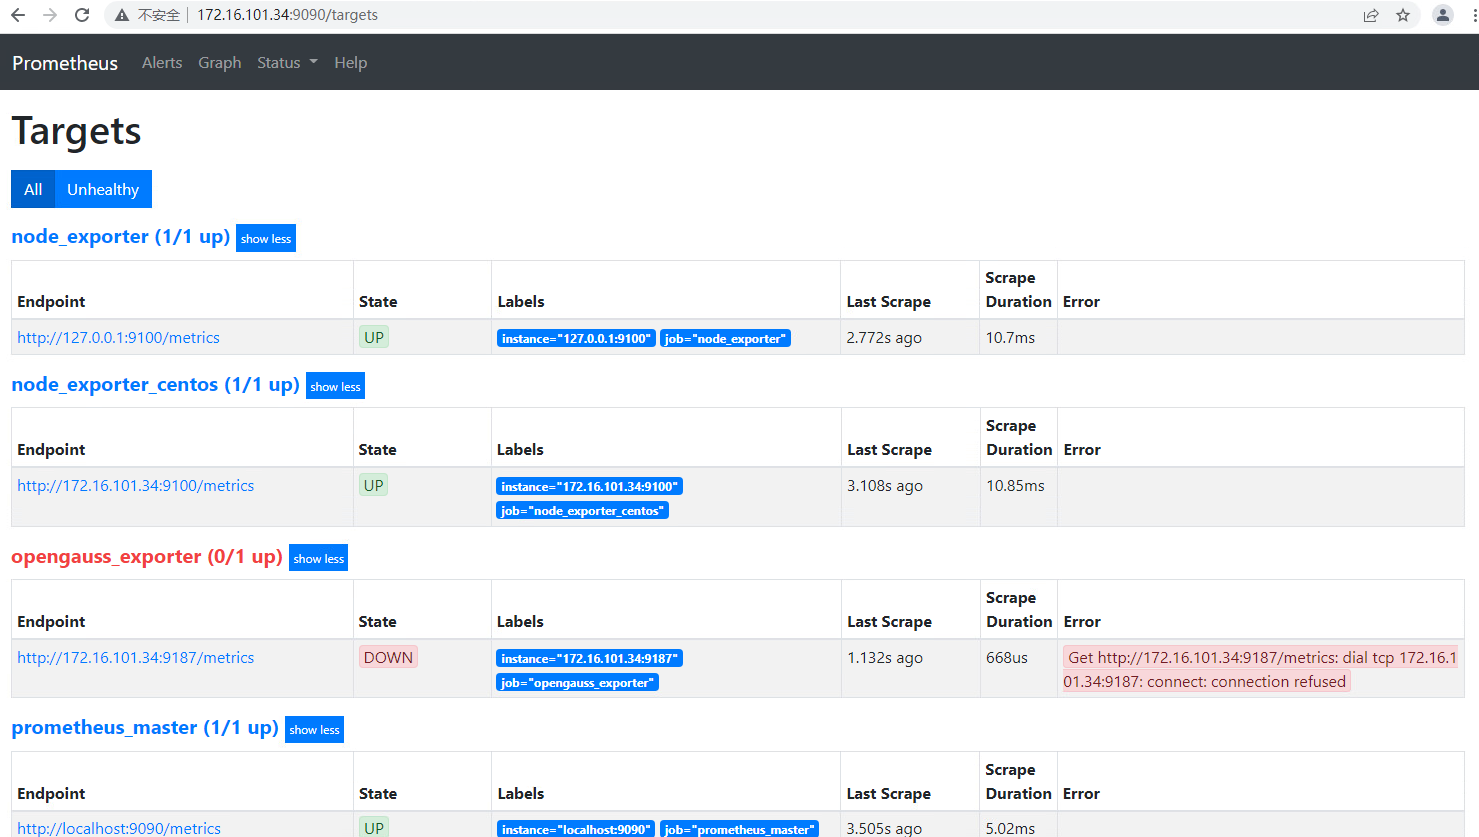
9、登录Prometheus服务器Web界面,并检查目标(Prometheus-Server-IP以实际为准)。
http://Prometheus-Server-IP:9090/targets
安装python3及gcc
yum install -y python3 python3-devel gcc
yum -y install gcc
yum -y install gcc-c++
安装psycopg2
推荐使用源码包安装,源码包下载地址为:https://gitee.com/opengauss/openGauss-connector-python-psycopg2 1、卸载已安装的psycopg2(如果没有安装则跳过,此步骤可能需要root用户执行)。
pip uninstall psycopg2 -y
2、上传并解压源码包。
unzip openGauss-connector-python-psycopg2-master.zip
3、安装。
cd openGauss-connector-python-psycopg2-master
python3 setup.py build
python3 setup.py install
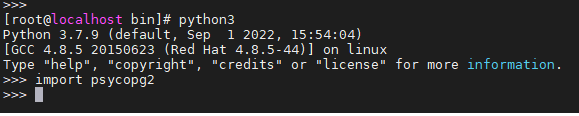
4、检查安装结果。
进入python3命令行,执行import psycopg2可以正常导入即表示安装成功。
安装Vastbase G100数据库
请参考安装部署指南。
开始AI配置
1、切换到安装的vastbase数据库用户,修改GUC参数。
su - vastbase_ai
vi $PGDATA/postgresql.conf
修改如下参数:
password_encryption_type=1
2、重启数据库。
vb_ctl restart
3、确保python 版本为3.7及以上版本,进入$GAUSSHOME/bin下dbmind 子目录。
python -V
cd $GAUSSHOME/bin/dbmind

4、安装依赖的第三方包(使用数据库用户)。
pip install requirements-x86.txt
5、执行gs_dbmind –help 查询功能是否安装正常。
gs_dbmind --help
配置目录初始化
请参考配置目录初始化。
